
PHOTOSHOP TUTORIAL: CREATING YOUR OWN DIGITAL COLLAGE ALBUM ART feat. Madeline McLaughlin

This is part two of the HEADS on: DIGITAL COLLAGE ALBUM ART series. To read the first part, and learn more about Madeline McLaughlin, click here.
Looking to shake up the design of your next album or single cover?
We asked filmmaker and digital collage artist Madeline McLaughlin to show us how she creates a digital collage from scratch, breaking down each step in this simple tutorial. We’ll be using Adobe Photoshop, which you can download here.
First, here’s the (super rad) sample album art designed for the purpose of this tutorial:
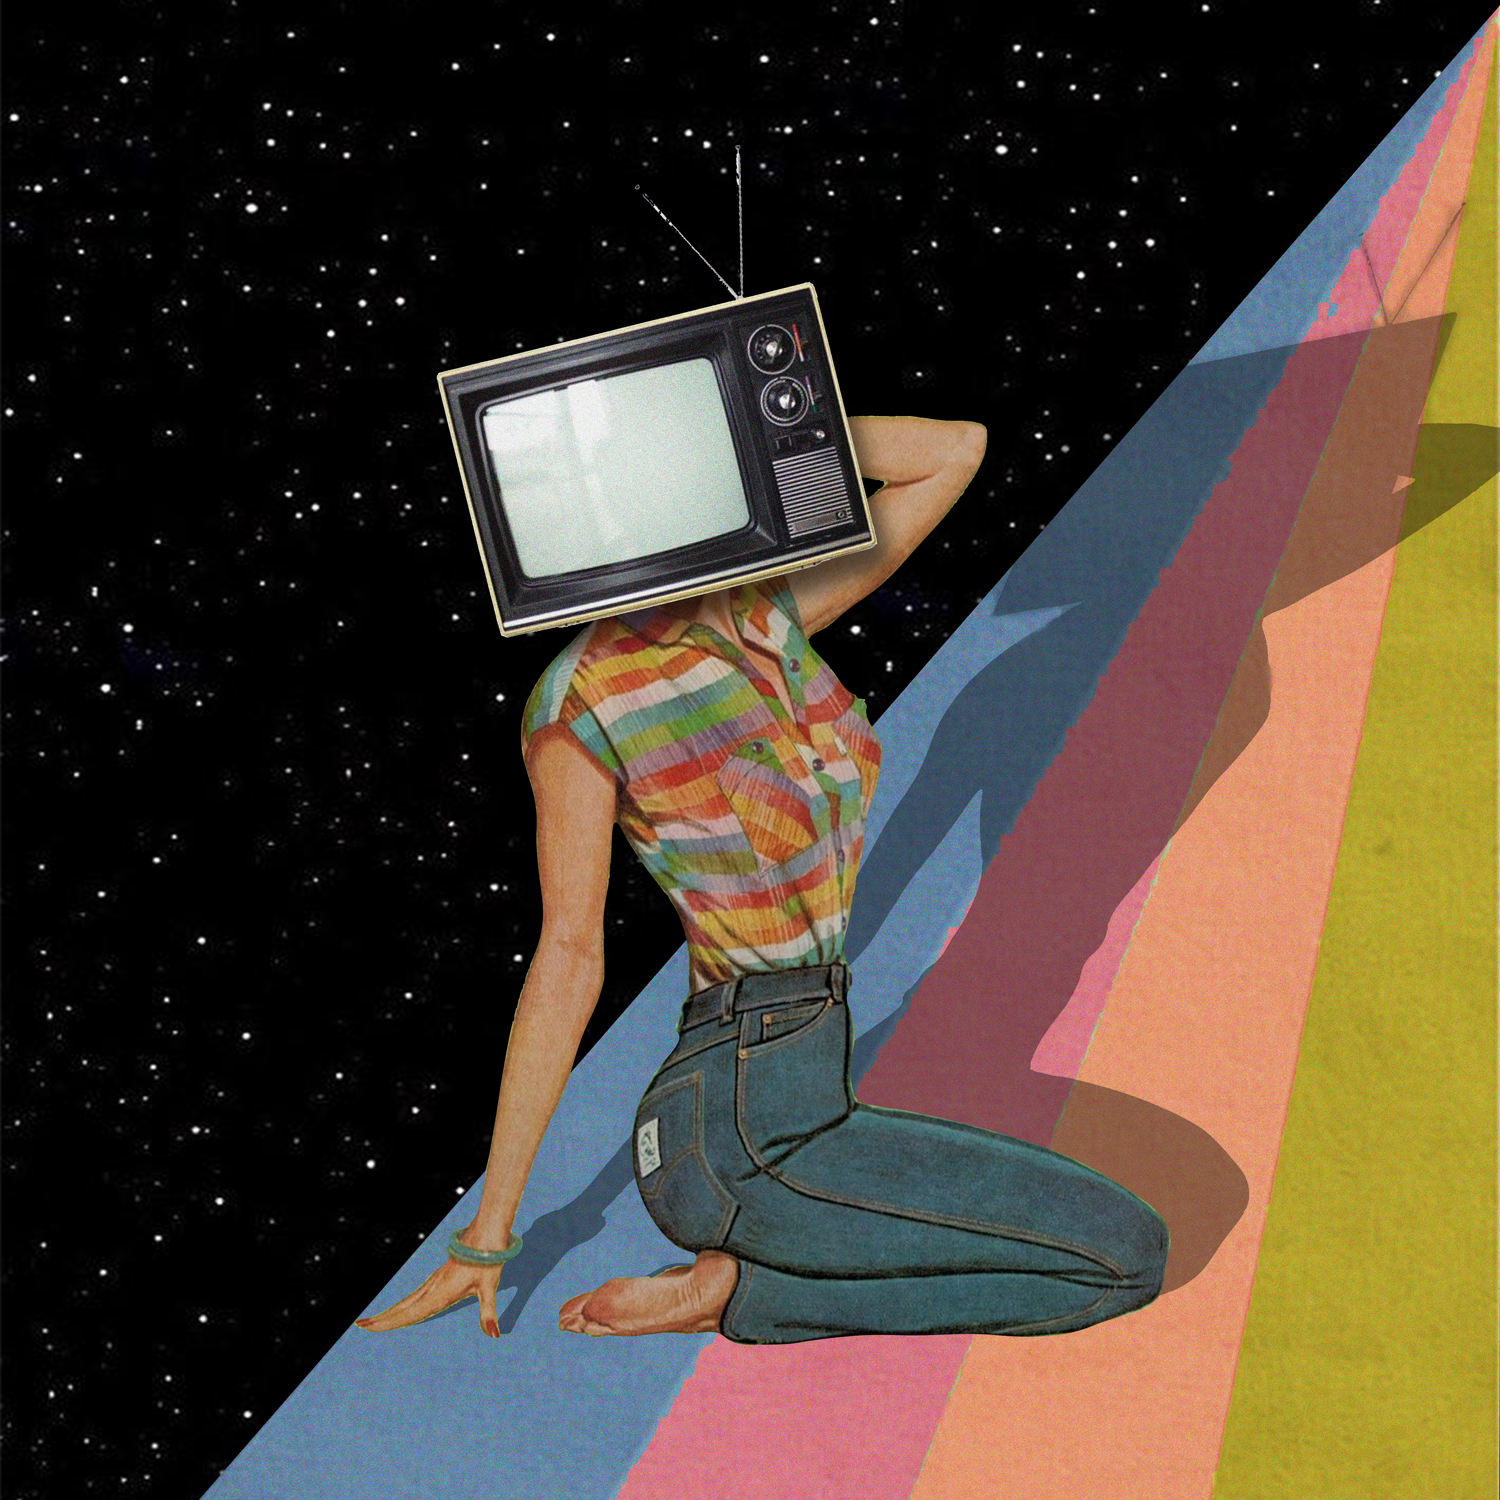
1. CREATING THE BACKGROUND
“For the rainbow, I used the Pen Tool to cut out the shape and then hit Mask at the top left.”

“I liked the colors better in this image so I used the Eyedropper Tool to select the colors from it. I then used the Paint Bucket Tool to change the colors on the original rainbow.”

“Since I changed the colors but still wanted the texture of the original image, I duplicated the rainbow, lowered the Opacity and changed the Blend Mode to Luminosity.”

2. DESIGNING THE CENTERPIECE
“For the image of the woman, I used the Curvature Pen Tool (as a human form has more curves to it) and then hit Mask again to extract her from the background.”

“To recreate the shadow that the head would naturally have, I went to fx down at the bottom right and selected Drop Shadow. I then adjusted the shadow until it matched.”

3. FINISHING TOUCHES
“To recreate the shadow that the head would naturally have, I went to fx down at the bottom right and selected Drop Shadow. I then adjusted the shadow until it matched.”

“For the shadow, I merged the woman and TV images layers and then duplicated the layer. Next, I selected the color Color Overlay option in fx and selected black at 100% opacity. I then lowered the layer’s opacity to create the desired shadow density. To create the shadow shape, I went to the top left to Edit, Transform, and then Skew. I then adjusted the shadow’s skew until it looked right!”

Here’s a time-lapsed look at all steps above, from start-to-finish: